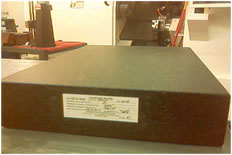
Large Favorite Spot
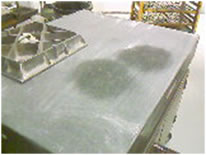
Usually when we see wear from normal use it is only one spot because the measuring instrument and the part being measured are generally setup and confined to a small, fixed area convenient to the machinist and are rarely moved. In this photo, however, we can see that there are two distinct wear spots caused by both the measuring instrument and the parts. We can safely discern that this is not two distinct “favorite spots” side by side because if the user were to move his setup to a new site for improved accuracy he would not do so directly adjacent to where he was working because he would not be able to determine how large the wear area was. Rather, he would rotate the plate, if on casters or simply move to the other side of the plate.
So the question remains, what kind of conditions or occurrences would cause two distinct wear spots side by side? A few things could be happening here. Two of which, either the part itself is large and heavy and has multiple dimensions that require enhanced inspection thus causing increased movement of the height gauge or indicator; or the type of measurement has changed. The former is fairly straightforward, so let’s take a closer look at the latter.
The lion’s share of measurements performed on a granite surface plate are linear measurements. A part has to be “X” inches high, long, wide and so on, or some dimension of the part must be “X” inches. A straight line from point A to point B. In addition to being used as a datum point a granite surface plate can also be used as a datum plane. So it is possible that the adjacent wear spot was caused by an angle measuring device just as heavy and moved just as much as the parts being measured. Angle plates are used to measure angles on parts through the use of or in comparison to the plates’ surface. These angle plates are considerably heavier and its flat surface provides more area of contact with the surface then a height gage or indicator base. If the plate is not kept clean then the oil, grit and grime that collect on the surface acts like a lapping compound and between the stone and an angle plate this compound can do a lot of damage.
Serious Wear
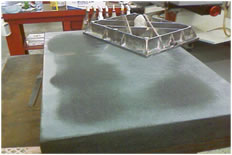
Well, this is an easy one to figure. We have a lack of attention, cleaning and regular calibration over a long period of time. For this to occur over the span of a normal calibration cycle would require the following circumstances as just a few examples:
- Multiple users and setups working on an undersized plate.
- Large, heavy parts on a dirty surface.
- Being used as a lapping plate.
The reality of this photo is that the plate had never been serviced…ever. If you use surface plates in your shop for measurements and have never had them calibrated, then consider the consequences of this photo. First, the cost of resurfacing this plate to within tolerance went above and beyond the normal unit cost. It was considered a repair rather than a resurfacing due to the additional amount of time and materials involved. Second, all measurements prior to the resurfacing and certification of this plate were suspect. The as found data on this plate was in the thousandths so for those of you who feel your measurements are coarse enough that you do not have to worry about keeping your plate certified or even just in good condition and do not see the value in calibrating your plates then think about how much money you have wasted on passing bad parts or rejecting good parts. If $200 seems like too much money to calibrate your plate then how much is too much when it comes to all the rework you must do because your inspectors pass bad parts? How about the thousands of dollars in scrap metal you have lying around? Scrap metal that used to be good parts but were rejected due to the inaccuracy of your inspection plate?
Wear Spot
Usually when we see wear from normal use it is only one spot because the measuring instrument and the part being measured are generally setup and confined to a small, fixed area convenient to the machinist and are rarely moved.
Favorite Spot
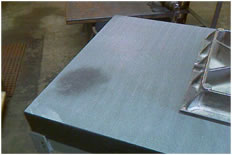
This is what happens when someone sets up a favorite spot on a 24” x 36” plate, like that mentioned in the opening paragraph. Frequently, machinists cells will be configured where their CNC machine and their surface plate are just a few feet apart and the machinist goes back and forth between the two a dozen times throughout the day, always using the plate in the same spot. Once the height gauge and gage blocks are setup for measuring a run of parts, then why move them when it would only waste valuable time? Why clean the plate when you would have to move your setup to do so? The answer is you do so to maintain the accuracy of your plate, ergo the accuracy of your measurements. As the carpenter needs to have confidence in his tools to ensure his work is square, level and plumb, so the machinist must have confidence in his measurements to ensure his part has the correct dimensions. Not to clean your plate or move your instruments on a regular basis is to sacrifice this accuracy. As seen in the photo, a wear spot begins to develop more quickly when proper preventive maintenance is not followed.
Iconel Rings

Frequently, granite surface plates are used as a work table rather than a precision measuring instrument. The circular wear configuration we see worn into this stone come from manufactured rings of some sort or from housings with sharp edges. They are placed on the plate and test indicators are setup and zeroed out on the ring itself or some aspect of the housing, such as, a flange or groove. The ring or part is then turned or spun on the stone to check for flatness or parallelism. This same characteristic may also be checked by moving the indicator and not the part.
Small Plate Wear
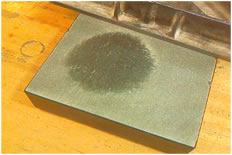
This 12” x 18” plate had an As Found reading of over .001 in. As you can see from the photo, the wear area affects over half of the plate which leaves very little room for accurate plate work. Most machine shops have their plates done annually. For this plate to accumulate .001 inches of wear over the course of a year it would be accumulating approximately 80 millionths of an inch per month. The tolerance for a grade B plate this size is .000110 inch which means that it would have gone out of tolerance after only two months and only one month for a grade A plate which has a tolerance of 60 millionths. Imagine a plate with .002 inches of error over the course of a year! Like the one in the photo below. No matter what the grade, it would be out of tolerance in one month’s time. Being out of tolerance does not mean merely having to resurface the plate in order to comply with a set of specs that some person or committee has put to paper, it means that your plate accuracy has been compromised, your measurements have been compromised! When it comes to Metrology two important things are confidence and accuracy.
The Correction Process
As granite technicians we have the utmost confidence in our measuring instruments, using them day in and day out, so we know exactly how much error has been worn into a plate without having to visually see wear spots like these. Included here are a few photos of a small 12” x 18” granite surface plate with severe wear as it goes through the resurfacing process.
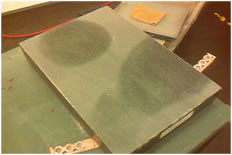
As you can see the plate in the photo above is so worn one could almost eat soup out of it! The As Found condition of the repeatability was pushing almost .002 inches. After data was taken it was setup on a sturdy surface in an open area where the technician had access to all sides of the plate from which to work on it. A few swipes with the lap revealed the condition of the wear spots in this plate. As the tech continued to resurface the plate with his lap these “holes” became progressively smaller and smaller until they were non-existent and the surface was restored to a smooth, uniform plane.
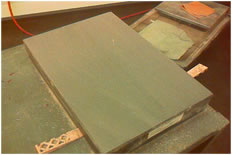
Once the wear spots were removed and the accuracy restored the stone is then cleaned, dried and repeatability measurements are taken again for the Final Results.
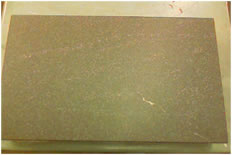
If the repeatability measurements (and the flatness measurements on larger plates) are within the federal specifications for its size and grade then the plate is certified with a calibration sticker on site and a certificate of calibration is generated, a copy is filed and the original is mailed to the customer.
